This is an old revision of the document!
Table of Contents
Getting Started
This page explains how to get started using TC (Tiny Core Linux) and applications.
These brief instructions are intended for users who are new to Linux as well as Tiny Core.
Getting TC running
Tiny Core starts from a CD called a “LiveCD”. This runs on the system without needing to be installed (handy if your version of MS Windows isn't working)! Actually one of the core tenets of Tiny Core is that it doesn't expect anything to be installed.
- Download the Live CD image
The image of the CD is an .iso file (about 12MB) which can be downloaded from downloads page. - Burn the ISO to CD
- - Your CD burning software needs to have an option (menu item) to burn an ISO image file or bootable ISO file. Use the bootable if both choices are available. Don't burn the ISO file as regular file, or an audio track.
- - After burning the CD, re insert it and open it in a file browser. If your see “tinycore-current.iso” … it won't boot. You must see a folder called “boot”. If you have trouble, search for notes on your software. Generic notes on common platforms: Linux - burn iso, Mac - burn iso, Windows - burn iso
- Boot the CD
The BIOS setting on your computer must be set so the CD drive is booted before other media(like the Hard Disk). Different manufactures use different keys to enter the utility to modify the BIOS settings. Watch intently when your system boots for a message like: “Press F10 to change system settings” or “Press DEL to enter setup”. If you see the MS windows logo it you missed it. Try holding down theCtrlkey while the system boots.
in 2-3 seconds you will see:
Simply press enter or add special options as shown by pressing F2 F3 F4
as described at bootcodes
For example to boot tiny core and avoid the timezone from defaulting to GMT you might use something like:
tc tz=US/Eastern hostname=DG12S-TESTBOX
Just a few screen blinks and 20 seconds later and \\You will see the Tiny Core Desktop!
The TC Desktop
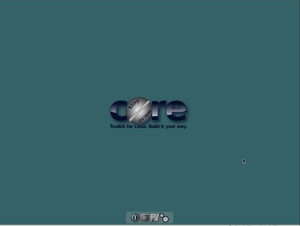
The TC desktop will appear after about 30 seconds(or less!). It will look something like:
(And here are some more Tiny Core screenshots.)
Four icons float at the bottom of the screen in an area referred to as wbar.
- The circle :shutdown, reboot or exit to a login prompt.
- The monitor : a Linux terminal ( aterm). You can type *nix-style commands in this text-only window. Sometimes, If you know *nix commands, the Terminal window is the fastest way to get things done.
- The screwdriver : Control Panel. The Control Panel gives buttons to access basic Tiny Core utilities.
- The gears : Appbrowser window enables you to get applications.
The Desktop Menu appears when you mouse click the desktop.
Base/stock Tiny Core intentionally includes no applications. Typical applications (like a web browser, word-processor, music player, etc.) must be selected by you, downloaded and installed. Fortunately, this is fairly easy thanks to … Appbrowser!
The Internet
(but I thought I was going to learn about Appbrowser!?)
First you need to connect your computer to the Internet. Tiny Core includes only a few modules (drivers), so your wireless connection may not work. Tiny Core does auto-magically connect just about every wired Ethernet cable connections, though.
If you only have a wireless connection (or if that is the only one that works), you will have to do some other configuration first. Read Setting up Wifi.
If you're one of the few that Tiny Core didn't set up right away, you can troubleshoot your network connection:
- Reboot, ideally without cycling the power. Some network cards act funny on a cold boot, but will work fine after a reboot.
- The first stop for help is usually the Tiny Core forums. Search for your problem there.
- If you know about command-line arguments to the kernel … try waitusb=5 (about 5 seconds). Some network cards don't boot up as fast as Tiny Core does. This will give them time to do that.
- If you know how to use the command-line tool ifconfig, use it.
Getting Applications
Tiny Core uses the Appbrowser to install “application extensions.” Briefly called “extensions”, these are the applications you want to use.
Appbrowser requires an internet connection (or at least having the extensions available locally). When you're set, check out the Appbrowser tutorial.
The Appbrowser gives users access to a lot of apps. Hundreds of apps, going on thousands. Each one is contributed by users just like you. The Appbrowser repository is generously hosted offsite (by ibiblio.org as of 2009/2010 - thanks, UNCCH!).
Is the repository missing something you want or need? Here are the current guidelines - submit it for a Tiny share of fame, glory, and honor.
Where now?
If your LiveCD worked (and especially if not), the next stop is the Tiny Core forum. You can learn about the people on the project, and become a contributor yourself.
You can also contribute by:
- Reporting on your Tiny Core installation and hardware
- Adding to (correcting/updating) this wiki
- Creating new items for the Appbrowser repository
- Using Tiny Core and reporting on your findings - not just bugs, but preferences, suggestions, etc.
Thanks from the Tiny Core Team - thanks for checking out Tiny Core, and for joining the project.
If your LiveCD did not work, it might with a different boot code? See http://distro.ibiblio.org/tinycorelinux/faq.html#bootcodes
Please check out the other wiki pages Index

