Table of Contents
ALSA
Sound is NOT built into base CorePlus, MicroCore or TinyCore, sound is implemented via extensions. I assume you are reading this because you a newbie.
OSS versus ALSA
Warning: These reasons are written for newbies, its an Unofficial recommendation.
- If you need skype –> ALSA (and suggest no Pulseaudio)
- If you need to change sound devices on-the-fly gui –> Pulseaudio (front end to ALSA)
- If you need to change sound devices no gui –> ALSA
- If you need easier surround sound –> Pulseaudio
- If you like command mode surround sound –> Try OSS
- If you have an ISA sound device –> Try OSS then ALSA
- If you need a sound modem (dial-up) plus normal sound out –> Likely to be ALSA
- If you need to use a webcam builtin mic –> Try OSS then ALSA
- If you need to play high quality sound files –> ALSA
- If you have a Intel device, that needs a tweak –> ALSA
OSS is easier to setup, but fewer people use it so you may not get the support you are looking for. ALSA is better suited to those with “better” sound devices or multiple sound devices or sound devices that need tweaked settings. As I have an intel device, that needs a tweak, multichannel sliders do no appear in my ossxmix image as OSS appears to not know how to handle my sound device. But ALSA had the same issue but was easier to resolve with some research.
good luck and click here for OSS wiki
Remove OSS
Rich setup guide
Install alsa-config.tcz and alsa.tcz
Install alsamixergui.tcz (optional)
Set the volume control on the front of the speaker about 1/3 of the way up
Run:
alsactl init
This produced a slight thump as the card was found and initialized. That command also unmuted the speakers and set the mixer volumes at sane levels.
Run:
speaker-test [-Ddefault:1] -c2 -t wav -l1
If all went well, you should hear the phrases “Front Left” and “Front Right” from your left and right speakers respectively.
Run:
sudo alsactl store
Run:
echo alsactl restore >> /opt/bootlocal.sh
Run:
echo usr/local/etc/alsa/asound.state >> /opt/.filetool.lst
Run a backup to save your setup.
Hearing sound using ALSA
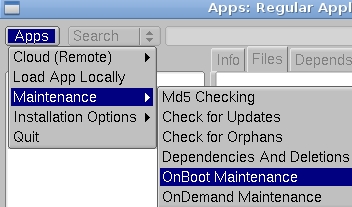
From the Apps panel, search and choose alsa and alsamixergui as onboot items. Also choose a gui media player, I prefer vlc, as onboot item then reboot computer.
If you only need to unmute or raise volumes see the next section on a graphical (mouse friendly) mixer.
If alsamixergui shows all “needed” outputs are unmuted and volumes already set ok, then, you do not need to adjust the mixer levels. Open your preferred media player and you may need to configure it to use ALSA. Navigate to /usr/local/share/sounds/alsa and play the sound files to test if you truly have 2 channel or surround sound. If no changes needed jump to persistence
Alternative mixer is a terminal mixer, command
alsamixer
If you need to make changes to your inputs such as microphone (mic) jump to alsamixer and the sections below that please.
If you need surround sound and the mixers control or options are not correct then jump to blacklist and read each section below until you get to index issues.
If you would like to read about surround sound, then jump to surround sound
If you have multiple sound devices, and the wrong one is currently showing in your mixer then jump to index issues
If you needed only to make mixer changes for outputs but everything else is OK, read the next section then you can jump to persistence
For HDMI users, if your hdmi is not showing in your mixer scroll down to the HDMI/asoundrc section please
All users who had to tweak, remember once done, you too need to visit the persistence section
You don't have to jump, (clickable links) as there are 2 pages so take your time to read and hopefully understand these pages
HDMI or .asoundrc users
Although I use HDMI as the main theme in this section, it applies to all users that need it and model=string in other sections or index strings does not resolve sound issues for you.
If your mixer does not show up your HDMI device, you are likely to need an /home/tc/.asoundrc file
Note its dot asoundrc, if you don't have one, we are going to create one now. But I don't have a HDMI sound device so will pretend to have one.
First run the command and look at my results and pretend you see mention of HDMI
tc@box:~$ aplay -l
**** List of PLAYBACK Hardware Devices ****
card 0: Intel [HDA Intel], device 0: STAC92xx Analog [STAC92xx Analog]
  Subdevices: 1/1
  Subdevice #0: subdevice #0
card 0: Intel [HDA Intel], device 1: STAC92xx Digital [STAC92xx Digital]
  Subdevices: 1/1
  Subdevice #0: subdevice #0
Now reducing my aplay command to bare essentials, it reads
card 0, device 0 (analog)
---subdevice 0
card 0, device 1 (digital)
---subdevice 0
But lets pretend you see output for digital and it reads
card 0 , device 1 (hdmi)
—subdevice 0
as the first subdevice tends to be hdmi, we can drop reference to it in the asoundrc but if you need it, add the extra line below device (number)
| subdevice (number) |
|---|
We next create a file to be saved as /home/tc/.asoundrc with contents in a code box for display purposes only
pcm.!default {
type hw
card 0
device 1
}

ctl.card0 {
type hw
card 0
device 1
}
The first string pcm……!default is telling alsa….try this device first for any application wanting to use sound.
Now as we newbies, instead of learning how to stop and restart alsa, we cheat and logout and choose “Exit to Prompt”, then run your mixer to see if you have HDMI showing up. If it does do a reboot and retest.
Now if you need to change any mixer level, click here for persistence
=====asoundrc wiki=====
http://alsa.opensrc.org/.asoundrc
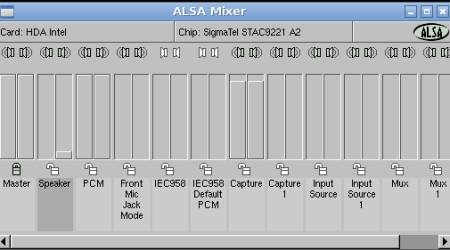
alsamixergui
Newbie alert: alsamixergui is only safe to use for outputs and I will demonstrate the outputs here.
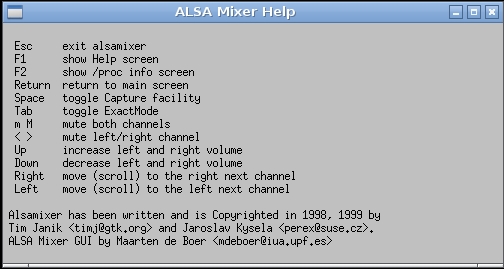
Press F1 for help
To Mute or un-mute sound out, we use our mouse to click on the “speaker icons” above the sliders.
green is on (unmuted) and white is off (muted)
To Lock or un-lock the sliders together we click on the padlock icon below the sliders.
To raise or lower volumes we
- click where you want the slider to be at or
- press the page up or page down buttons or
- hold the up or down arrows for slower movement
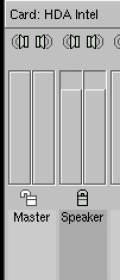
In the next image, I have clicked the speaker selection, it turns grey to show its active for mouse or keyboard inputs
I then clicked the padlock to re-lock the volume sliders
Then clicked where I wanted the volumes.
Can you spot where else I have clicked?
If on reboot, you can see your sound device is detected, but you hear no sound then you need to make changes to your mixer levels and to save that configuration called persistence so you don't need to redo it over again on reboot.
If you can see your sound device in the mixer panel, then ALSA and its TinyCore script called alsasound has does its job. Mixer settings can not be predicted for all users, so you may need to tweak them.
If you can not see your sound device in the mixer panel, try running the alsamixer command. If you can not see your sound device, then choose alsaconf from the Apps panel as an onboot item and reboot your computer. See the alsaconf section for more details.
If you can see your sound device, but you are not seeing surround sound channels, then you need to do a tweak.
This is more likely for Intel sound devices. See the something section on how to proceed.
Newbie alert: If you needed to make a change to any mixer, alsamixergui or alsamixer,
then you “need” to setup persistence. If you plan on not making any other changes other than to output mixer settings you can jump to persistence
If you have multiple sound devices or the mixer channels are not correct or still no sound continue reading please.
Technical details for Newbies if no sound
To hear sound, you need a sound tcz to load called alsa.tcz (this also loads dependencies)
On boot up, that tcz provides a script called alsasound. That script provides the relevant sound modules.
It attempts to restore any persistent sound files. If no persistent sound files are found, it sets up “default” mixer levels.
Default mixer levels may result in an output being muted or volume too low, in which case review the alsamixergui section
If still no sound, you can try the following tests assuming alsmixergui did not work for you.
To test if any sound module(s) are loaded run
lsmod | grep snd
To test what sound devices ALSA detects run
aplay -l
Here are my outputs to give you an idea
lsmod | grep snd
snd_hda_codec_idt      40960  1
snd_hda_intel          20480  0
snd_hda_codec          49152  2 snd_hda_codec_idt,snd_hda_intel
snd_hwdep              12288  1 snd_hda_codec
snd_pcm                45056  2 snd_hda_intel,snd_hda_codec
snd_timer              20480  1 snd_pcm
snd                    32768  6 snd_hda_codec_idt,snd_hda_intel,snd_hda_codec,snd_hwdep,snd_pcm,snd_timer
soundcore              12288  1 snd
snd_page_alloc         12288  2 snd_hda_intel,snd_pcm

aplay -l
**** List of PLAYBACK Hardware Devices ****
card 0: Intel [HDA Intel], device 0: STAC92xx Analog [STAC92xx Analog]
  Subdevices: 1/1
  Subdevice #0: subdevice #0
card 0: Intel [HDA Intel], device 1: STAC92xx Digital [STAC92xx Digital]
  Subdevices: 1/1
  Subdevice #0: subdevice #0
Now the essential driver for intel users is snd_hda_intel followed by the codec entry. If you have multiple sound devices, aplay output will show card 0,1 etc
If no sound kernel module loaded, aplay will fail
aplay -l
aplay: device_list:240: no soundcards found...
Some reasons why sound kernel modules are not found, include:
- tcz not included in onboot.lst (or if applicable, other needed tcz files)
- kernel modules exist, but not for this sound device
- firmware may be required
- modules exist, but a system setting such as the bootcode has “blacklisted” the loading of the module
- modules exist, but a module “option” disables sound outputs
alsaconf when the aplay list is empty
If you downloaded alsa and its in your onboot list and you rebooted, you should have sound devices configured. You may need to adjust the mixers to hear sound. However, if
aplay -l
does not show any devices, then download alsaconf so its also an “onboot” tcz and reboot to retest your sound. If on reboot, no sound devices are detected, then run
sudo alsaconf
and follow the prompts to search and configure your sound device.
Users with ISA sound devices may need alsaconf. If the only changes were to mixer levels or running alsaconf you can now jump to persistence
blacklist
This option needs edit of your boot loader config with root powers. This is unofficial recommended way for all users where:
- module displays incorrect mixer channels or lacks quirk etc (model=string usage)
- you have an internal device you never use, you want only an USB device to gain index=0 value
- there are 2 modules available for your sound device and the wrong one is grabbing control of your device.
- you have 2 or more sound devices and you want to use a local bootcode, meaning you do not want to disable any device.
The name of your your bootloader config file will vary depending on your software. If you use grub, its likely to be /boot/grub/menu.lst.
If you prefer to use a blacklist bootcode then use lsmod to find your sound module then use bootcode=
| blacklist=sound_module_name |
|---|
eg I use blacklist=snd_hda_intel
If you have multiple modules to blacklist you can use the formula
| blacklist=sound_module_name,module_2,module_3 etc |
|---|
Blacklist for permanent disable of internal sound device
So if you have a computer where the internal sound, onboard or isa or pci is faulty or deficient, blacklist the internal sound module.
On reboot, any new sound device detected (USB) will grab index=0 value, the value preferred by skype and other media playing software and you do not need persistence unless your mixer levels for USB device need changing etc.
From then on, treat your USB device like an internal device and re-read whether you have sound device detected, hear sound, need mixer levels changed etc.
bootlocal.sh tweaks - Part one -- alternative blacklist type method
Newbie alert: This section is for those who could not use default sound mixer controls or wish to disable internal sound devices. The effect of the modprobe -r is to remove the module which is the same effect as blacklisting but may be more suitable for newbies.
Use root powers to edit /opt/.bootlocal.sh instead of editting your bootloader config file. The bootlocal script does not know about blacklisting of modules so we do this by a remove module command. There are 2 ways of removing modules so I will only show the one way to keep it simple? For example
| /sbin/modprobe -r snd_hda_intel |
|---|
Upon reboot for any named sound module, lsmod will now fail if that was a needed module. The reasons are showing in the blacklist section above.
One advantage of this newbie technique is you can on-the-fly test out various model=string or quirks through running commands like this
sudo /sbin/modprobe -r sound_module_name
sudo /sbin/modprobe sound_module-name model=string
In other words, what we test live, is roughly what we show in bootlocal but drop the word sudo
Reasons for changing
In this section, the blacklist is the same as the modprobe -r command. But we are doing it, because you find that the mixer channels or switches or options are not a match to your actual hardware. This is true for my intel device and may be true of a number of intel devices but also affects some other sound module users such as AC97.
This means we need to research our sound device to find what options we need, if you did have sound or if you need more channels etc. Before rebooting with that new bootlocal entry, check what your sound module accepts as parameters. I prefer to call them options. For example
modinfo snd_hda_intel
filename:       kernel.tclocal/sound/pci/hda/snd-hda-intel.ko.gz
description:    Intel HDA driver
license:        GPL
vermagic:       3.0.21-tinycore SMP mod_unload 486
parm:           power_save_controller:Reset controller in power save mode.
parm:           power_save:Automatic power-saving timeout (in second, 0 = disable).
parm:           beep_mode:Select HDA Beep registration mode (0=off, 1=on, 2=mute switch on/off) (default=1).
parm:           patch:Patch file for Intel HD audio interface.
parm:           enable_msi:Enable Message Signaled Interrupt (MSI)
parm:           single_cmd:Use single command to communicate with codecs (for debugging only).
parm:           probe_only:Only probing and no codec initialization.
parm:           probe_mask:Bitmask to probe codecs (default = -1).
parm:           bdl_pos_adj:BDL position adjustment offset.
parm:           position_fix:DMA pointer read method.(0 = auto, 1 = LPIB, 2 = POSBUF, 3 = VIACOMBO).
parm:           model:Use the given board model.
parm:           enable:Enable Intel HD audio interface.
parm:           id:ID string for Intel HD audio interface.
parm:           index:Index value for Intel HD audio interface.
depends:        snd-hda-codec,snd-pcm,snd,snd-page-alloc
If this is too much info for newbies, ignore the modinfo command.
Research your sound device
lsmod shows what your sound module is. Now use that information to check the list of files for sound module options and tweaks
ALSA-Configuration.txt
Audigy-mixer.txt
Audiophile-Usb.txt
Bt87x.txt
CMIPCI.txt
ControlNames.txt
HD-Audio-Models.txt
HD-Audio.txt
Joystick.txt
MIXART.txt
OSS-Emulation.txt
Procfile.txt
README.maya44
SB-Live-mixer.txt
VIA82xx-mixer.txt
alsa-parameters.txt
emu10k1-jack.txt
hda_codec.txt
hdspm.txt
powersave.txt
seq_oss.html
serial-u16550.txt
Intel and some other users may need to check their codec in case one sound module has multiple codecs.
head -n1 /proc/asound/card0/codec\#0
Codec: SigmaTel STAC9221 A2
This information may be seen in alsamixer command or in alsamixergui, if it works. Then for Intel users, read HD-Audio-Models.txt and for my sound module I note the following options
But I have just had to change while testing PA and the new preferred method for intel users is this link http://voices.canonical.com/david.henningsson/2012/07/13/top-five-wrong-ways-to-fix-your-audio/
and so we now use model=auto.
bootlocal.sh tweaks - Part two -- to change mixer controls or settings
Part 1 where you also have a blacklist
Blacklist your sound module in your bootloader config file using root powers.
Add the following line to your bootlocal file, but change formula to actual module and actual model details
| /sbin/modprobe sound_module model=string |
|---|
eg I use /sbin/modprobe snd_hda_intel model=auto
Part 2 where you have not blacklisted
You will need a remove module and re-insert module command, using formula for example
| /sbin/modprobe -r sound_module |
|---|
| /sbin/modprobe sound_module model=string |
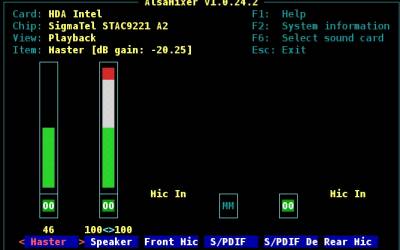
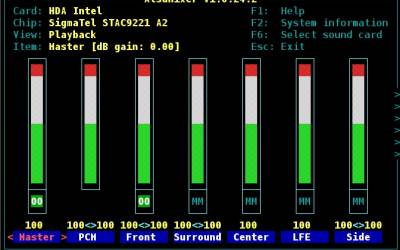
Before I tweaked bootlocal my first time boot up image was
on tweaked reboot the image becomes 2 channel, but surround sound capable.
index or sound device number issues
As a general rule, most software applications, wanting to play or record sound, prefer to use the first detected sound device. We call this index=0 even if you have not setup any index value. Its the same as saying the card number and ALSA counts devices from zero not from one.
Lets look at someone with an internal device and an external device. Options are:
- Default, Alsa detects internal device before USBs, so internal obtains index=0 value.
- Then you insert your USB device and so it gets index=1.
- No changes needed to any files for above but a problem if you want USB to get index=0 —- so next is a possible solution
- User blacklists the sound module for internal device
- USB inserted at any stage of bootup achieves index=0
- For above, use blacklist
- User uses USB at home but needs internal when they travel (portable computer)
- Can use manual commands or scripts to have the effect of remove module, insert new module with index=0.
- May prefer the harder to setup, but easier to use in the long run method, jump to choose sound devices at boot
